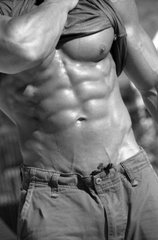
All about fitness!

If you're interested in fitness, bodybuilding, loosing weight, wanting to be fit, or just interested in fitness! You came to the right place! Stay in touch with all the latest news! Check out the Blog Archive! :)

Tuesday, August 14, 2007

ROAD MAP TO HUGE ARMS


ROAD MAP TO HUGE ARMS
Arm workouts going nowhere? Green-light rapid growth with M&F’s eight-week guide to sleeve-busting bi’s and tri’s

Story by: BILL GEIGER, MA, AND JIM STOPPANI, PHD

BIG, PUMPED ARMS — THE KIND THAT LOOK LIKE A ROAD ATLAS, with veins crisscrossing like a Southern California freeway interchange — are the ultimate destination for every bodybuilder. But if your personal road to sleeve-busting bi’s and tri’s has been more like a long series of roadblocks, potholes and detours than one of green lights and open highways, it’s time to merge into the fast lane of muscle growth. Our eight-week road map provides the fastest route to increased arm size, strength and muscular detail. And even though you’re a guy, we’ve painstakingly mapped out the directions so you get on the fast track to growth instead of wasting your time driving in circles.

DESTINATION: BIG ARMS
The superhighway to thicker arms requires a workout tune-up. First, instead of training arms just once over the course of your split, now you’ll work them twice. Training muscle groups more frequently stimulates genes in the muscle cells that instigate muscle growth. More frequent workouts (to a point) keeps those genes stimulated longer for better muscle growth.

On Saturday (see training split), you’ll hit your biceps and triceps in one session with a variety of exercises and rep ranges. In this split, Saturday follows a rest day. Whatever sequence you use, make sure your main arm day is after a rest day so you’re fresh and can devote full energy to your training. This enables you to go heavier and achieve greater intensity.

On Monday, after your chest workout, you’ll hit the triceps with a single bread-and-butter move to finish them off — after all, they’ve been getting more than their share of the workload in heavy pressing moves. The same goes for the biceps: On Tuesday, you’ll do a single exercise after back training to increase the blood flow to the bi’s and engorge them.

GPS TO ARM SIZE
You can overtrain your arms if you do too much work for too long, so return to your regular training split after eight weeks. Introducing change into your routine in this manner creates the opportunity for improvement, but it doesn’t continue indefinitely. Keep in mind that your ultimate arm size is also related to your genetic potential, although many of us never reach it because we lack patience, persistence and the know-how to get there.

Since it’s nearly impossible to build bigger arms when dieting down, you must consume enough overall calories and protein to not only sustain you during your training sessions but guarantee muscle growth as well. This means not missing meals, following a smart supplementation plan to ensure you get the required muscle-building nutrients, and paying attention to your pre- and postworkout meals. In tandem with this training routine, follow the “Road Map to Huge Arms” diet and supplement program that begins on page 130.

Ultimately, you’ll reach your final destination of bigger bi’s and tri’s faster if you follow a map to get there. While there are no shortcuts for hard work, at least you won’t be spinning your wheels following a random or haphazard plan. And that can only mean a green light for growth!

Download the full pdf version of this article, print and take it to the gym.

pdf ZIP (win) file
pdf STUFFIT (mac) file

GH WORKOUT


GH WORKOUT
Looking for a natural way to send your growth hormone levels through the roof? Try this four-week, research-based, GH-boosting lifting program

Story by: JIM STOPPANI, PHD, AND JOE WUEBBEN
Art/Images by: MICHAEL DARTER

We all know that growth hormone promotes the accumulation of lean muscle tissue, and that boosting growth hormone levels leads to still more gains. In this feature, we unleash the means by which you can increase your GH levels naturally. Supplements can help, yes (see “Tipping the GH Scale” on page 104), but there’s an even simpler way: training. By working out within specific parameters pertaining to exercise selection, sets, reps and rest periods, you can send GH levels soaring for a bigger, stronger, leaner body. We call it our Growth Hormone Training Program. It’s totally clean, totally legal and totally effective.

GROWTH HORMONE: THE ULTIMATE PROTEIN
Few people realize that growth hormone (GH) is actually a protein — but this particular protein is produced in the brain’s pituitary gland, which secretes GH into the bloodstream. There it travels to tissues such as muscle fibers (where it enhances muscle growth), fat cells (where it improves the release of fat) and the
liver (where it increases the release of insulinlike growth factor-1, or IGF-1, another protein responsible for facilitating many of GH’s benefits in the body). GH levels remain fairly low throughout most of the day and peak at night while you’re asleep. You can, however, get a GH peak during the day via training.

When you lift weights, your body releases GH to drive the anabolic effects that lead to muscle regeneration and growth, as well as to encourage the use of fat for energy. GH levels usually peak immediately after a worko
ut ends and gradually decline to normal levels over the next several hours. (This rise in GH postworkout is associated with a rise in lactic acid levels.) Research confirms that the rise in GH following a hard workout is critical to the muscle growth process. One study reported that subjects who trained to boost GH levels higher than other subjects experienced significantly greater gains in muscle mass and strength. Due to the numerous studies on the effects of weightlifting on GH levels, we now know the best way to train to maximize them.

Here’s a quick rundown of the basics: As far as exercise selection is concerned, multijoint exercises that stress multiple muscle groups work best. Regarding volume, i
t appears that reps in the 8–12 range and performing more sets per muscle group — but not too many — is the way to go. When it comes to rest, less rest between sets stimulates GH levels better. Finally, high-intensity techniques that take muscles beyond failure are crucial. In fact, one study found that using forced reps tripled GH levels following a workout compared to training that stopped at muscle failure.

Given these conclusions, the m&f Growt
h Hormone Training Program stresses basic core exercises, performing 8–12 reps for 12–20 sets per bodypart and rest periods of 60–90 seconds, as well as high-intensity techniques such as rest-pause, drop sets and forced reps. Although the research to date has confirmed that only forced reps boost GH levels, it can be assumed that any intensity technique that takes a set beyond failure will boost GH levels similarly.

Due to the intensity you must put into every workout to maximize growth hormone levels, our program uses a four-day split in which you train each muscle group just once a week. For example, on Monday train chest, triceps and abs; Tuesday is for legs and calves; Wednesday is an off day; Thursday work shoulders, traps and abs; and Friday is
back, biceps and forearms. (Saturday and Sunday are also rest days.) This split allows you to put all the intensity you need into each session and gives your body enough time to recover, which is critical to prevent overtraining and to keep GH levels high.

TRAIN FOR GROWTH
We designed the four-week GH-boosting program in alternating fashion. Weeks 1 and 3 are identical (up to 20 sets per bodypart, 8–10 reps per set, 90- second rest periods and rest-pauses incorporated), as are Weeks 2 and 4 (up to 16
sets per bodypart, 10–12 reps per set, 60-second rest periods and drop sets). Changing variables in this fashion will help prevent stagnation while still keeping training parameters in the desired range to increase GH. The one constant week to week is forced reps, which you’ll implement throughout.

In the program chart starting on page 98, each exercise includes a corresponding “GH Booster” — forced reps, rest-pause or drop sets. Use the technique on only the last two sets of each exercise. Any more could lead to overtraining.

Since training with such intensity for a long period would be counterproducti
ve, follow this program for only four weeks. After, don’t work past muscle failure as often. Feel free to come back to the GH program after eight weeks off, but no sooner. Let’s hope you’ll be able to hold out that long. M&F

TIPPING THE GHSCALE
Use these tips for maxing out y
our GH levels during your workouts.

1. Don’t eat a high-fat meal (10 grams of fat or more) within four hours before a workout. Research shows that when a high-fat meal is eaten before exercise, the postworkout GH response is more than 50% lower th
an when a low-fat meal is eaten. Choose lean protein sources such as whey protein, chicken or turkey breast, lean beef, light tuna and lowfat dairy for meals consumed within four hours before training.

2. Eat slow-digesting carbs before workouts. Slower carbs will not only give you longer-lasting energy for t
he workout but also keep insulin levels low. High insulin levels during training blunt fat-burning and can limit GH release. Stick to preworkout carbs such as oatmeal, fruit and whole grains.

3. Supplement before your workout to maximize GH release afterward. Tr
y the following stack 30 minutes before your preworkout protein intake, as all of these supplements have been shown in clinical studies to boost GH levels: arginine (5–9 grams), glutamine (5–10 grams) and melatonin (0.5–5 mg).

4. Warm up. Research shows that when your core temperature is lower during exercise, so is your GH r
esponse following exercise. This holds especially true when training in colder climates. Take a quick and easy walk on the treadmill for about five minutes and be sure to perform several warm-up sets of your first exercise. Just don’t overdo it on the cardio — take the term “quick and easy” literally.

5. Do cardio after weights. Research confirms that when cardio is done before weights, GH levels following the workout are three times lower than if the cardio was done after lifting. This applies to both moderate-intensity cardio done for longer periods and high-intensity sprints for very short bursts.


Training: Big Finish


BIG FINISH
Finishing off your routine with moves that take you to the limit is the fast-track route to muscular growth

Story by: BILL GEIGER, MA
Art/Images by: IAN LOGAN

Great endings— whether they occur in sports, on film or on your last date — are the memorable ones. Such was the case in the surprise finish to the 1999 film The Sixth Sense when the viewer discovered, along with Bruce Willis’ character, that he’d been dead all along. On the football field, Vince Young’s late heroics powered Texas to a thrilling win over USC in last year’s BCS title game. What does this have to do with your workouts? Everything. Sure, what you do at the beginning of your routine when your energy levels are highest has a profound effect on how successful you are at reaching your goals. But it’s what you do at the end that makes the difference between completing a workout that felt just good and one in which you’re completely fatigued, pumped and exhilarated, having left it all on the gym floor. That’s how you know you’ve fully exhausted the muscle fibers, putting them in the best position to benefit optimally from the ensuing recuperation/repair/growth cycle.

To put you squarely within that window of opportunity, here we prescribe a finishing move for each of your main muscle groups — an exercise or combo with which you complete that bodypart’s workout and take the muscle to its working limit. We recommend isolation moves rather than multijoint exercises, allowing you to concentrate fully on the muscle in question and eliminating assistive muscle groups. In addition, we favor using machines over free weights, alleviating the worry about having to balance a weight after your stabilizer muscles have already been worked overtime.

To crank up the pressure even more, we apply intensity-boosters such as drop sets and supersets to our finishing moves. This increased intensity means you can push every single muscle fiber to its threshold. Perform these finishing moves last for the appropriate bodypart, and if you train more than one bodypart in a workout, you can do a finisher for each. Sure, it’s tough, but that’s how you guarantee a fantastic finish. You may not have Vince Young’s moves, but you can still have an MVP workout — every workout.

FINISHER FOR DELTS GIANT SET: BENT-OVER LATERAL RAISE + LATERAL RAISE + DUMBBELL UPRIGHT ROW + OVERHEAD DUMBBELL PRESS

>> Here’s one in which light weights can be made to feel heavy. Since you do this set last, you don’t need to worry about using less weight; focus on making the muscle really burn. The giant set may use some of the same moves you already did in your workout, but that’s okay. Here, we’re training just for the pump.

START: Bend at the waist, knees unlocked, holding a fairly light pair of dumbbells just outside your legs.
MOVE: Do a bent-over lateral raise for rear delts, then stand up and go right into a lateral raise for middle delts. Immediately do an upright row, keeping your elbows high, then finish off with an overhead dumbbell press. When you’re done, don’t just stand there — raise your arms directly overhead and hold for 60 seconds.
SETS + REPS: Selecting the proper weight is crucial; going too heavy means you won’t be able to complete many reps, and going too light will make it too easy. Start with a weight that’s 10–15 pounds lighter than what you’d normally use for 10 reps of lateral raises. That’s a relatively easy weight for the first move, but that will help fatigue the muscle. You want to be able to do about 10 reps for each of the four moves. Don’t forget to raise your arms at the end. Rest about two minutes and repeat.

FINISHER FOR CHEST THREE-WAY CABLE CROSSOVER
>> This single-joint move is done over three angles. This cablecrossover tri-set comes from fourtime NPC Mr. Puerto Rico Mauricio Solis, 35, a personal trainer at Extreme Body Gym in Humacao who says it gives him an incredible pump. Use a weight about 10 pounds lighter on each side than you’d normally use for 10–12 reps.
START: Attach D handles to the upper-pulley cables and stand midway between the stations with your feet hip-width apart. With a slight bend in your elbows, pull the handles down until your arms are roughly parallel to the floor. Keep your head straight.
MOVE: Squeeze your pecs and bring the handles together in a wide arc directly in front of your lower abs, mimicking a most-muscular pose. Hold the peak contraction for a count, then slowly retrace the arc to the starting position. Bring the handles down to your midsection for the first seven reps, then bend over 90 degrees and do seven more with your upper torso parallel to the floor and your arms perpendicular to your torso in the finish position. Finish off by taking two big steps forward and performing similar to the first seven reps, bringing the handles out in front of your body as if you were hugging a barrel.
SETS + REPS: Do three sets of 21 reps each set.

FINISHER FOR QUADS AND HAMS LEG EXTENSION (WITH DROP SET) SUPERSET WITHWALKING LUNGE
>>The best measure of a good leg workout is not being able to walk up the stairs when you’re done. This intense superset, which is a favorite of Solis’, provides the added pleasure of burning the muscle from the innermost fibers. The moves help build quadriceps detail and separation.
START: Grasp a barbell or a pair of fairly light dumbbells and keep the weight(s) close to the leg-extension machine. Sit snugly in the machine so that your knees are just off the edge of the pad.
MOVE: Contract your quads to fully straighten your legs. Focus on the peak contraction and hold it momentarily; don’t explode the weight up just to let it quickly fall back. Allow the weight to pull your feet all the way down, but not to the point where the weight stack touches. Repeat until you reach failure, then drop the weight by 20%–30% and perform as many more reps as you can. Jump off the machine and do a set of walking lunges in an open space, taking a long stride and allowing your body to descend just short of your back knee touching the floor.
SETS + REPS: Choose a weight that allows you to do 12 reps on the leg extension and at least 10 steps per leg on the walking lunge. Rest two minutes after the lunges and repeat the superset twice more.

FINISHER FOR TRICEPS ROPE PRESSDOWN (CONTINUOUS REST-PAUSE DROP SET)
>> Perform this basic triceps move as a burnout. Start with a fairly challenging weight, then drop the pin one plate between sets. Do as many reps as you can, resting as long as it takes to reset the pin and shake out your arms — about 25 seconds only. Repeat until you’ve fried your tri’s.
START: Attach a rope handle to an upper-pulley cable and grasp it with a neutral grip (palms facing each other). Stand erect, pinning your elbows to your sides for the duration of the move. Allow the handle to pull your forearms up to where they’re just above parallel to the floor.
MOVE: Squeeze your triceps to press your hands toward your thighs, turning your palms downward (pronation) to spread the handles apart at the bottom to further contract the muscles. When you can’t do any more reps this way, simply keep your hands facing each other and perform as many reps as you can. Reduce the weight by just one plate and repeat. Continue this pattern of going to failure with pronation and then without, taking a short break and dropping the weight.
SETS + REPS: Do one long set, starting with a weight with which you can do only about 10 reps. Drop as many as 5–6 times — or until your arms feel as though they’re going to fall off.

FINISHER FOR BICEPS
>> This move is more than just a good mass-builder — it also helps chisel the kind of detail and refinement that make arms a standout bodypart, Solis says. You’ll add an isotension move between sets, a fancy way of saying you’ll flex your bi’s very hard.
START: Hold a pair of dumbbells by your sides. Have extra ones nearby in increments of 10, 20 and 30 pounds lighter than the ones you start with.
MOVE: With your elbows locked by your sides, curl one arm at a time, bringing the weight close to your shoulder — the key is to not allow your elbow to pull forward to ensure the front delt doesn’t assist with the move. Lower the weight and alternate sides. Once you reach failure, drop the weights, pick up the next lightest pair and repeat for as many reps as you can per set. Rest only after you take all four weights to failure.
SETS + REPS: Start with a weight that allows you to complete about 10 reps. After you finish the series of drop sets, rest for about two minutes, alternately flexing your biceps as hard as you can for 15 seconds, with 15- second rest intervals, then repeat the drop set.

FINISHER FOR BACK STRAIGHT-ARM PULLDOWN SUPERSET WITH STANDING LOW-CABLE ROW
>> This superset combines a good isolation move for the lower lats with a high-rep move done at a nearby cable station to deliver a knockout pump to your back.
START: Attach a neutral-grip V-handle to a low-pulley cable for the second half of the move and select a weight with which you can complete about 15 reps. Then attach a lat bar or a short straight bar to the upperpulley cable and stand erect about 2 feet or arm’s length from the bar. Use an overhand, shoulder-width grip, keeping your arms straight and your knees slightly bent. Pull the bar down until your arms are parallel to the floor.
MOVE: Pull the bar down until it approaches your thighs, feeling your lats do the work. Repeat for reps, then quickly move to the low cable, standing just more than arm’s length from the V-handle. From a slightly bent-over position with your feet wide and your back in its natural arch, pull the handle into your midsection, bringing your elbows as far back as you can. As you start to fatigue, speed up the pace.
SETS + REPS: Perform one set of the straight-arm pulldown for 10–12 reps, then quickly do a set of 15–20 rows. Rest about two minutes and repeat twice more. M&F

Monday, August 13, 2007

Say Bye-Bye to Sagging Skin

Women ask me all the time, "What can I do for my sagging skin? Even after I've lost weight, I look terrible." Other women who have not lost weight yet, worry that they will have loose skin if they lose weight.

    Are you ready to sink your teeth into a new lifestyle, one that will help you drop pounds and improve your health? Try one of our 24 super diets. To get the ball rolling, simply click here and fill out a free profile.
Loose skin is not a problem if you know what you're doing when you work out. You can tighten up that loose skin by making it cling to developing sleek muscles. Now don't panic. I'm not talking bodybuilder muscles, I'm talking about sexy, feminine muscles that will simply make you look tight, toned and defined.

Two of the most common "loose skin" places on women are the triceps and the thighs. (In case you don't know, the triceps are located on the other side of your biceps and are often referred to as the "flag-wavers.")

I used to have plenty of loose skin on my arms and my thighs, and look what I've done for myself -- not in hours, but minutes a day, and being consistent.

I got in this shape and you can, too, lifting light weights the right way. You can start out as light as two or three pounds and build up to say, 12 as you get stronger. As long as it works for you, you're getting as much out of it as someone who is stronger than you and lifting heavier weights.

If I could do it, anyone can do it. I'm lazy -- and by the way, I just celebrated my 64th birthday.

The following exercises are a good start.

1. The seated double-arm dumbbell press for loose skin on the triceps.
Sit at the edge of a chair or bench, holding a dumbbell at either end with one hand at each end, palms facing forward. Hold the dumbbell which is in a horizontal position, straight up with your elbows nearly, but not quite locked.

Movement: Flexing your triceps muscles as you go, and keeping your elbows as close to your head as possible, lower the dumbbell behind your head until you cannot go any further. Give your triceps muscle another hard flex and return to start position. Do this movement 10 times and move to the next exercise.

2. The front squat for loose skin on front thighs.
Stand with your feet a natural width apart, with a dumbbell in each hand resting on each shoulder; your arms are criss-crossed.

Movement: Keeping your back straight and your eyes straight ahead, lower yourself to a comfortable position, making sure you do not threaten your knees. Even a small amount of lowering goes a long way. Feel the stretch in your thighs and return to start position, flexing your front thighs as hard as possible on the up movement. Repeat until you have done 10 repetitions. Return to the first exercise: Repeat this series two for times for a total of three times.

To get rid of the lose skin anywhere on your body, go to my Web site at www.joycevedral.com and see my Loose Skin Remedy Package deal.

Fab Abs: 10 Best Exercises

Fab Abs: 10 Best Exercises

By Jason Knapfel
eDiets Senior Editor

There are many things that men and women disagree on. When to take the garbage out. Toilet seat, up or down? Action flick or Romance? But there's one thing we all want -- a slim midsection.

While you can't wake up to a washboard stomach at the end of this week, after you finish this article, you'll be happy to know that you're doing the most effective exercises to get you to that point some day very soon!

    Want flatter abs? Leaner legs? A better butt? Let eDiets help you shape up and slim down for summer with our NEW Summer Fresh Diet! Click here to get started today with a free diet profile!
eDiets Chief Fitness Pro Raphael Calzadilla is here to share his 10 best ab exercises to get the washboard stomach you've always dreamed about.

Follow Raphael's lead and you'll see a transformation in your tummy in just a few short weeks. The first step you need to take is changing the way you view your ab work. It's a common misconception that you are going to trim the fat in your midsection. Ab exercises aren't going to reduce the area. But they do develop the muscles. You need to improve your diet to reduce the fat.

Another common mistake many people make is doing too much, too often, Raphael says.

"One of the biggest misconceptions people have is the belief that they need to work five or six days a week to get their abs looking good. They also think they have to perform 15 sets. In reality, the muscles are like any other muscle group that needs to recover from any type of workout in order to make progress. Your ab workout shouldn't take you more than 12 minutes, three days a week."

If you don't know what you're doing, you can actually do more harm than good. Take sit-ups for example. This popular move can lead to back and neck injuries if you don’t have proper form. Sit-ups also work more of the hip area than the abdomen, Raphael points out.

There are good reasons for building strong ab muscles other than "looking hot." The core of your body is the abs and the lower back.

"All of the strength of the rest of the body stems from the core," he says. "It also helps as far as improving balance and flexibility and reducing injury. Having weak abs and a weak lower back is an invitation for injury."

In addition to working the abs, Raphael stresses the importance of healthy diet and regular cardio exercise. Before you can achieve a flat stomach, you need to reduce overall body fat.

Here the 10 most effective abdominal exercises. Raphael suggests that beginners start with the Ab Crunch and Reverse Ab Curl.

1. Bicycle Maneuver (studies actually prove this to be one of the most effective)

Starting Position:

  • Lie on a mat with your lower back in a comfortable position.
  • Put your hands on either side of your head by your ears.
  • Bring your knees up to about a 45-degree angle.

    Movement:

  • Slowly go through a bicycle pedaling motion alternating your left elbow to your right knee, then your right elbow to your left knee.

    Key Points:

  • This can be a more advanced exercise. Do not perform this activity if it puts any strain on your lower back.
  • Do not pull on your head and neck during this exercise.
  • The lower to the ground your legs bicycle, the harder your abs have to work.

    2. Ab Crunch

    Starting Position:

  • Lie on a mat on your back.
  • Make sure that your lower back is relaxed against the mat during this exercise.
  • Bend your knees until your legs are at a 45-degree angle.
  • Keep both feet on the floor.
  • Place both hands behind your head.

    Movement:

  • Contracting the upper abs, raise your head and upper torso off the floor until your shoulders are slightly lifted.
  • Slowly return to the starting position, stopping just short of your head touching the floor.

    Key Points:

  • Exhale as you contract the abs.
  • Inhale while returning to the starting position.
  • Keep your eyes focused on the ceiling to avoid pulling with your neck.
  • Your hands should not be used to lift the head or assist in the movement.

    3. Reverse Ab Curl

    Starting Position:

  • Lie on the floor with your back relaxed and your hands on the floor by your hips.
  • Keep the upper back pressed into the floor throughout the exercise.

    Movement:

  • Contracting your abs, raise your butt and gently roll your hips off the floor, stopping when you feel a full contraction of the abdominals and can no longer lift your hips.
  • Slowly return to the starting position.

    Key Points:

  • Exhale while lifting your hips.
  • Inhale while returning to the starting position.

    4. Double Crunch

    Starting Position:

  • Lie on the floor face up.
  • Bend your knees until your legs are at a 45-degree angle with both feet on the floor.
  • Your back should be comfortably relaxed on the floor.
  • Place both hands behind your head.

    Movement:

  • Contracting your abdominals, raise your head and legs off the floor toward one another.
  • Slowly return to the starting position, stopping just short of your shoulders and feet touching the floor.

    Key Points:

  • Exhale while raising up.
  • Inhale while returning to the starting position.
  • Keep your eyes on the ceiling to avoid pulling with your neck.
  • Your hands should not be used to lift the head or assist in the movement.

    5. Cable Kneeling Rope Crunch

    Starting Position:

  • On a mat, kneel in front of the cable machine with your body facing the machine. Hold a rope attached to the upper cable attachment keeping your elbows in toward your ears.

    Movement:

  • Contracting the oblique muscles, curl your body downward on an angle rotating your right elbow to the left knee, stopping when you have reached a full contraction of your obliques.
  • Slowly return to the starting position, stopping just short of the weight stack touching.
  • You can either alternate side to side or do 8-12 repetitions on one side and then repeat on the other side.

    Key Points:

  • Exhale as you lift the weight.
  • Inhale while returning to the starting position.

    6. Machine Hanging Knee Raise (should use spotter or have someone watch you)

    Starting Position:

  • Grasp a chinning bar with hands shoulder-width apart and palms facing forward. Keep your upper body motionless throughout the exercise.

    Movement:

  • Contracting the abdominal muscles, raise your legs with bent knees while gently rolling your hips under, stopping when you feel a full contraction of the abdominals and can no longer lift your hips. You may get your knees to 90 degrees or higher depending on your strength and flexibility.
  • Slowly return to the starting position.

    Key Points:

  • Exhale while lifting your legs.
  • Inhale while returning to the starting position.

    7. Fitball Advanced Reverse Crunch (not for those with back injuries)

    Starting Position:

  • Lie on the ball with your upper back supported by the ball and hands above your head, holding onto a solid support, such as the support for a cable machine in the gym or the footboard of your bed at home.
  • Bring your legs up until your hips and knees are each at a 90-degree angle.

    Movement:

  • Contracting the abdominals, curl your legs up toward your body.
  • Slowly return to the starting position.

    Key Points:

  • Exhale while lifting your legs.
  • Inhale while returning to the starting position.
  • Lower your legs only as far as you can while maintaining control.

    8. Lying Bent Knee Leg Lift (care needed for those with back injuries)

    Starting Position:

  • Lie on your back with your feet on the floor and knees slightly bent.
  • Place your hands under your head for comfort, not support.

    Movement:

  • Contracting your lower abdominal muscles, draw your knees toward your chest until they form a 90-degree angle with the floor.
  • Slowly return to the starting position, stopping just short of the feet touching the floor.

    Key Points:

  • Exhale while lifting your legs.
  • Inhale while returning to the starting position.
  • Your back should remain comfortably against the floor during the entire motion.
  • Avoid this exercise if you have any back conditions.
  • Eliminate this exercise if you experience any discomfort.

    9. Machine Angled Leg Raise

    Starting Position:

  • Support your body on your elbows in a Roman Chair or by hanging from a chin-up bar.

    Movement:

  • Contracting the abdominals and obliques, draw your knees up on an angle so that they move toward your right elbow. Stop when you get a full contraction of the obliques and abdominals.
  • Slowly return to the starting position, stopping when the hips are almost fully extended.
  • Alternate side to side to complete the set.

    Key Points:

  • Exhale while lifting your legs.
  • Inhale while returning to the starting position.
  • Keep the upper body stationary throughout the exercise.

    10. Incline Bench Leg Raises (care needed for those with back injuries)

    Starting Position:

  • Lie on an incline bench and stabilize your body by gripping the bench above your head with your legs extended out.

    Movement:

  • Contracting the lower abs, raise your legs up until your hips form a 90-degree angle.
  • Slowly return to the starting position, stopping just short of your legs touching the bench.

    Key Points:

  • Exhale while lifting your legs.
  • Inhale while returning to the starting position.
  • Point your chin toward the ceiling to avoid using your upper body.
  • To increase the difficulty, cross your arms over your chest.
  • Wednesday, July 25, 2007

    Workout Series: Baby got back

    workout series: baby got back

    The muscles of the back are important for many activities as well as maintaining good posture and balance. Whether your sport involves swinging a bat, throwing a basketball, smacking a puck or just lifting groceries out of the trunk of your car... strong back muscles can improve performance and reduce your risk of injury. Even if you don't want "big wings" like Arnold... strengthening your back can make everyday activities easier and help you feel great.
    Incorporating these exercises into your regular workouts can help you develop your back muscles. Periodically change the exercises and/or amount of weight that you lift (depending on your goals) to avoid plateaus and keep your muscles stimulated. Don't neglect other parts of your body. It's important to do a full-body workout to develop a well-rounded look and prevent muscular imbalance.
    As with any resistance training program, how you lift depends on your specific goals. If you don't know how to lift to reach your goals, talk to one of our fitness professionals for more information. If you've had any type of back pain or previous back injuries you should check with your doctor for specific limitations prior to starting a new workout program.
    The muscles involved, how they attach to the body and the movements they perform are important for any resistance training exercise. Performing an exercise incorrectly or forcing the body into an unnatural position will reduce the effectiveness of the movement and greatly increase your risk of injury. If you have any questions ask for a demo from one of our fitness professionals. Keeping the the "action" and "attachment" in mind while performing an exercise can help you maintain the proper technique.

    lower back

    Muscles: the spinal erectors
    Attachment: these muscles originate on the pelvis, vertebrae and ribs and attach to the ribs, vertebrae and back of the skull.
    Action: extension and lateral flexion of the spine.

    lower back exercises:

    • Superman: lie flat on the floor on your stomach with your arms extended over your head. Lift your arms, shoulders and chest off the floor and hold for 3-4 seconds. Relax and return to the starting position. Repeat 2 more times. If this becomes too easy, increase the time you maintain the elevated position. This exercise can also be done on an exercise ball.
    • Back Extension: this exercise can be performed in a back extension chair or on an exercise ball, in a prone position (face down) and your body weight supported by your hips and pelvis. Clasp your hands behind your head (or in front of your chest) and lift your upper body until your back is straight. Be careful not to go too far and hyperextend your back. Return to the starting position and repeat 8-12 repetitions. Rest and repeat according to your specific goals/abilities. When this becomes easy, you can hold a light weight plate up to your chest to increase the resistance.
    • Good Morning: this can be done seated or standing. For many people, your body weight may be enough resistance. For others, rest a light barbell on your shoulders and hold it in place with your hands. From the seated position, slowly bend forward at the waist as far as you comfortably can. Slowly return to the starting position and repeat 8-12 repetitions. Rest and repeat according to your specific goals/abilities. For the standing position your feet should be shoulder width apart and your knees should be slightly bent. Slowly lower yourself as comfortable as possible without going below a 90 degree bend at the waist. Rest and repeat according to your specific goals/abilities.

    upper back

    Muscles: latissimus dorsi, teres major and rear deltoid.
    Attachments: the lats originate on the vertebrae and pelvis and attache to the upper front part of the humerus (bone of the arm); the teres major and the rear deltoid originate on the shoulder blade and attach to the upper bone of the arm (humerus).
    Action: all three muscles bring the arm closer to the body (as in a pull up) and also extend the shoulder.

    upper back exercises:

    pull downs:

    • Lat Pull-down: this should be done using an overhead pulley station and can be done with an overhand grip, an underhand grip, a narrow grip or a natural grip (handle where knuckles are facing each other). Use a slightly wider than shoulder width grip for overhand pull-downs and a shoulder width grip for underhand pull-downs. Pull the bar towards your chest and stop when your elbows have formed a 90-degree bend for a wide grip or all the way to your chest for an underhand grip. Return to the starting position and repeat 8-12 repetitions. Rest and repeat according to your specific goals/abilities. It's not necessary to bring the bar to your chest when using an overhand grip. Bringing the bar closer than is comfortable for your body places unneeded stress on the shoulder joint and doesn't offer any benefits. *See note below.
    • Stiff-arm Lat Pull-down: this is done using a high cable pulley station and a wide grip bar. Stand in front of a high pulley station and grasp the bar at shoulder width, keeping your arms straight and without locking your elbows, pull the bar down towards your upper legs. Keep your legs slightly bent and not lock your elbows. Repeat for 8-12 repetitions. Rest and repeat according to your specific goals/abilities.
    • Pull-Up:these can either be done on an overhead bar or a machine assisted pull-up machine. Grasp an overhead bar at shoulder width using a traditional (underhand) grip, an overhand grip or a narrow grip. Lift your body, bringing your chest towards the bar. Return to the starting position and repeat as many times as you can. Rest and repeat according to your specific goals/abilities. *See note below.

    * Skip the behind the neck pull-ups and behind the neck lat pull-downs. These exercises are less effective based on the physiology of the muscles (how they attach and the movement they perform). Behind the neck movements also increase the risk of injury because the shoulder joint is placed in an unnatural position increasing stress to the joint during movement. Leaning your head forward to complete a behind the neck exercise also places the head/neck in an unnatural position and even more risk of injury.

    rows:

  • Seated Row: Sit at a low pulley station. Using an overhand, underhand or natural (knuckles facing) grip, grasp a handle that allows your forearms to stay perpendicular to your body. Pull the handle back towards your abdomen, focusing on moving your elbows back. Slowly return to the starting position without leaning forward and keeping your shoulder blades together in their natural position. Keep your upper body and your waist in the same position and focus on pulling back with your arms. Repeat 8-12 reps. Rest and repeat according to your specific goals/abilities. Remember the action of the muscle and limit upper body movement for a more effective workout. **See note below.
  • One-Arm Cable Row: standing in front of a low cable pulley station with your knees slightly bent, grasp a handle in one hand. Pull the handle back towards your abdomen focusing on pulling with your elbow. Pretend like you're starting a lawn mower. Return to the starting position without locking your elbow and keeping your shoulder blade in its natural position. Complete 8-12 reps and repeat for the opposite side. Rest and repeat according to your specific goals/abilities. **See note below.
  • Bent Over Rows:
    Wide-Grip Bent Over Barbell Row: using a straight barbell, stand with your feet close together and your knees slightly bent. Bend over slightly at the waist and keep your back straight. Limiting movement in your body, pull the barbell up towards your abdomen. Repeat 8-12 reps. Rest and repeat according to your specific goals/abilities.
  • Bent-Over Dumbbell Row: support your body on a flat bench with your left knee and your left hand and keep your back straight throughout the movement. Hold a dumbbell in your right hand with your arm extended. While keeping your shoulder blade in its natural position, lift the weight towards your abdomen. Imagine there is a string attached to your elbow lifting the weight. Return to the starting position, but remember not to extend your shoulder blade out of a natural position. Complete 8-12 reps and repeat for the opposite side. Rest and repeat according to your specific goals/abilities.

  • ** Keeping your shoulder blades in their natural position throughout a row exercise creates a more effective exercise. When your shoulder blades extend forward the muscles must pull the shoulder blades back into their natural position before the exercise movement can be performed. Returning to a natural shoulder position reduces the amount of time resistance is applied to the muscle and reduces the efficiency of the exercise.

    straps or no straps?

    Because your back muscles can lift more weight than your grip can usually handle, many people like to use straps to increase the amount they lift. Some people don't like straps because they don't allow you to develop grip strength. So who's right? Depends on your individual goals and why you're lifting. If grip strength is important to you or for a specific sport (i.e. rock climbing) then you shouldn't use straps. If your goal is overall health and fitness and grip strength isn't an issue, straps can improve your workout for the larger muscle groups. It all depends on your goals.

    Wednesday, July 18, 2007

    Workout Series: The Abominable Abdominal

    workout series: the abominable abdominal

    Washboard abs are the hottest item in the fitness world and sought after by both men and women. Washboard abs require a lot of discipline, healthy low fat diet and a fairly low percentage of body fat. Many people have an excellent abdominal routine but they also have a thin layer of subcutaneous fat covering up all their hard work. It's important to burn off this layer of fat to see the fruits of your labor.
    Working your abs smarter, not longer will help you get in a good workout without doing 250 crunches. For many, the crunch is the only exercise in their abdominal workout and they just keep piling on more sets and reps to reach their fitness goals. If you want to develop your abs, you have to use different exercises just like you would with any other muscle. Try some of the abdominal exercises below to add variety and get a good ab workout.
    The Muscles: there are 5 muscles that make up the Abominable Abdominal. The rectus abdominus originates at the pubic bone and attaches to the lower portion of the ribs. Its job is to flex the spine and shorten the distance between the rib cage and the pubic bone. The internal and external oblique muscles (there?s 1 internal and 1 external oblique on each side of the rectus abdominus) are also between the ribs and the pubic bone and they laterally flex the spine (same as above but adding a sideways motion).
    Hanging Knee Lift: these can be done from an overhead pull-up bar. This exercise is often done incorrectly, the key is to: use a slow controlled movement, limit upper body movement and not moving you hip joints during the exercise. The abdominal muscles attach to the pelvis not the legs; lifting your knees at the hip joint is a great exercise for your hip flexors but not your abs. Keep your knees and hips stable and lift the pelvis, legs and knees as one unit towards your chest.
    The Bicycle: This is a slow, fluid movement that stimulates your abdominal muscle and obliques by crunching and twisting and alternately extending your legs. This may sound a little confusing, but remember that all 4 limbs should be moving at the same time. Lying on your back with your hands behind your head, contract your abs and lift your shoulders off the floor. Slightly twist your torso and point your right elbow towards your left knee as you?re lifting your left knee up until it forms a 45-degree bend (your leg should remain slightly bent). Slowly twist your torso to point your left elbow towards your right knee as you lower your left leg and lift your right knee until it forms a 45-degree angle. Hold the extended leg off the floor until you bring it back to the 45-degree bend. Do as many as you can and go as slow as possible.
    Crunch: the crunch can still be a great exercise to include with other abdominal workout. Try variations to the regular crunch to stimulate your muscles differently for better results. Lying on your back, rest your left foot on your right knee and crunch your right elbow towards your left knee. Repeat with the opposite side. Using an exercise ball while crunching is another way to stimulate your abs a little differently and you?ll also use other trunk stabilizing muscles to maintain your balance.
    Reverse Crunch: as the name implies, this is performed by crunching the lower portion of the abdominal muscles up towards your chest. Start by lying on your back on the floor with your hands at your sides for balance. You knees should be bent at a 90-degree angle and your upper thighs should be perpendicular to your body. Keep your hip joint and knees in this position throughout the movement. Slowly roll your hips and legs off the floor and flex your lower spine to raise your lower back off the floor. Think about lifting your hips off the floor using your abs and avoid "jerking" into motion and using momentum to complete the exercise. Slow controlled movements will limit risk of injury and give your abs a great workout. This is an advanced exercise and using proper form is important for the effectiveness and to limit injury. Moving your hip joint and knees puts stress to the lower back and should be avoided.
    All of these exercises should be done in a slow controlled manner and remember to breath. Going slow helps you avoid building momentum and reduces the risk of injury to your back and spine. If you?re placing your hands behind your head for any abdominal exercises, be careful not to use your arms to lift your head and shoulders. Not only does this place stress on your neck and spine; you?re also removing some of resistance from your abs.